
Getting Started: Resources to help you setup, customize and manage your Create@UniSQ Site
Exporting a Create@UniSQ Site
After course completion, you will continue to have access to your Create@UniSQ site for one year. During this time you can login and access your site using your UniSQ login credentials.
However, for ongoing security and facility, including career planning and employability, students are advised to download their portfolio and upload to their own WordPress site as soon as possible after completing their studies.
Exporting Your Data to Another WordPress Platform
For many users, the best option will be to export your data from the Create@UniSQ Platform and import it to another WordPress Platform. There are a range of good options for hosting a WordPress site, including:
- WordPress.com
- Edublogs (for education)
- WPEngine
- Self-Hosted WordPress – see WordPress.org for further info.
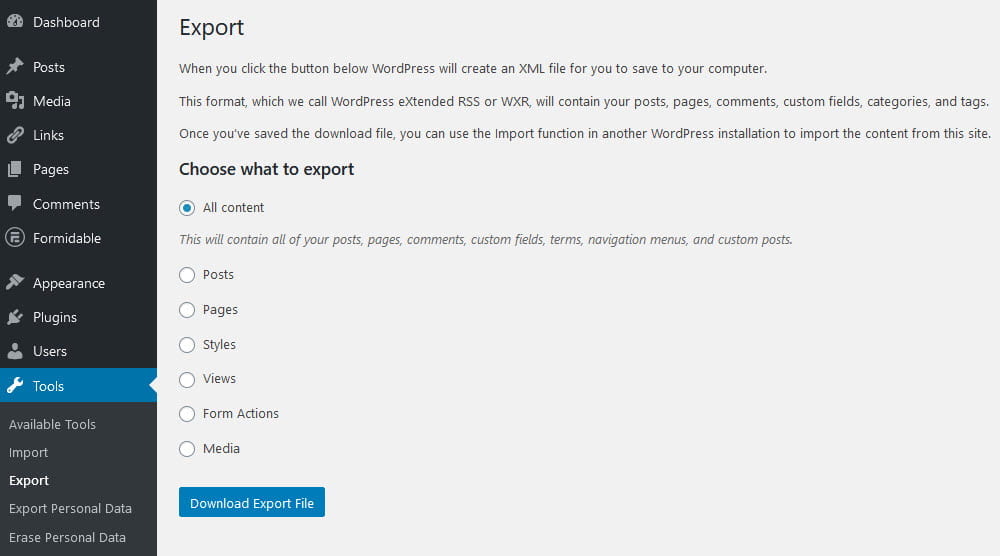
To export your site, follow the steps below:
- Go to Tools > Export from the Dashboard.
- Select the content you wish to export (we suggest All Content).
- Click on the blue ‘Download Export File’ button.
This will download a special file to your computer that can then be uploaded to another WordPress site, or possibly other platforms.
Please note: The Export function will only export posts, pages, comments, terms, and menus from your site. It will not export featured images, themes, plugins, or any special functionality provided by plugins.
Additionally, the export file contains only links to images, not the actual images themselves. This means that the export of images will only work while your Create@UniSQ site still exists and is visible to the public.

Useful Links
Check out the following guides for more info:
- WordPress.com – Exporting Content
- WordPress.com – Importing Content
- WordPress.org – Importing Content
- WordPress.org – Exporting Content